
So You Want Acrylic Wedding Invites...
Just last week I mailed off my first batch of custom acrylic wedding invites! Phew. It was a journey to finish them and I’m excited to share the whole process with you, plus everything I learned along the way.
Whether you’re a couple thinking about acrylic for your suite of wedding materials or a designer who’s been commissioned to work with it, I’ll walk you through the costs, time, and investment it takes to create with acrylic! Let’s get into it.
Acrylic is rapidly gaining popularity in event design - I’ve seen lettered signs, tiny placecards, keepsake boxes, and more pop up all over social media in the last couple years. It’s definitely a beautifully striking medium: weighty to hold, and reactive to the environment around it due to its transparency. It’s also difficult to mail, easily scratched, and expensive to print on. Pros and cons, y’know. Something important to note is that it is not the most sustainable choice - acrylic is a type of plastic and therefore not biodegradable.
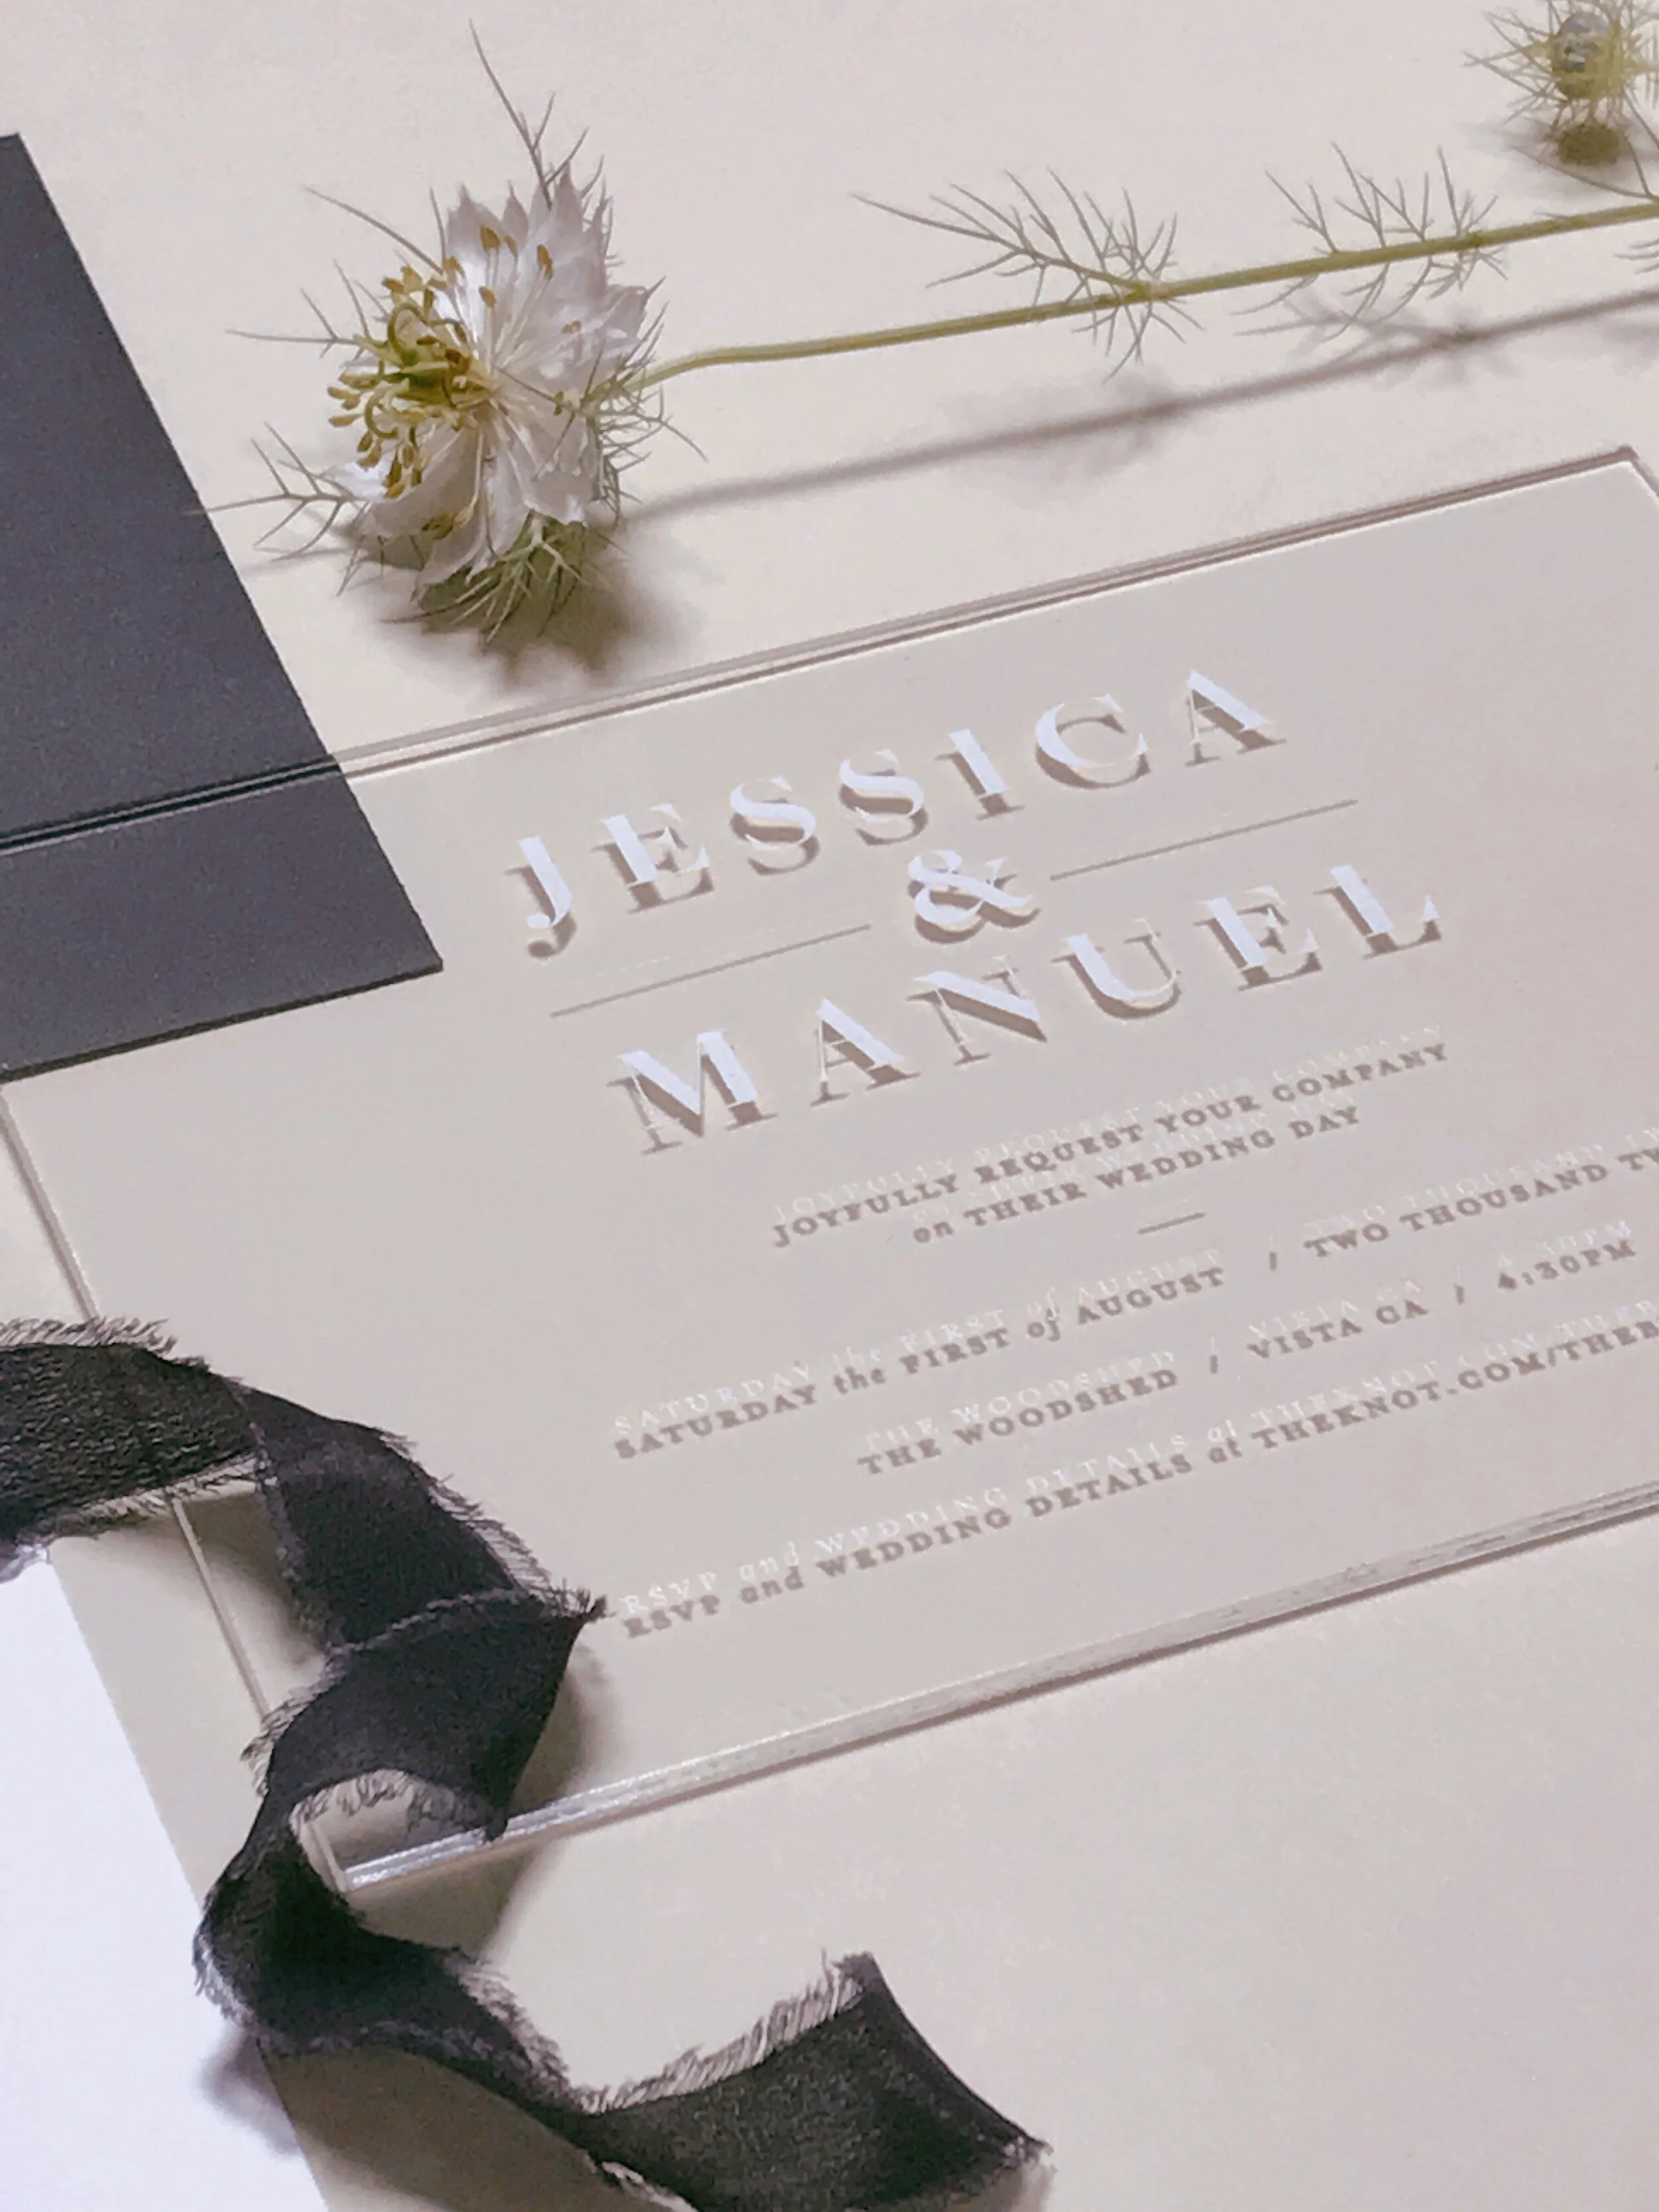
When my latest couple asked me if I wanted to give acrylic ago, I was super jazzed since I had never done it before. They envisioned a striking suite of paper goods from start to finish and wanted the works (every designer’s dream client). White linen paper, hand painted envelopes and black silk ribbon for the save the dates, and acrylic wrapped in black vellum, sealed with black wax and deep midnight envelopes for the formal invitations.
I love it when couples care as much as I do about every tiny detail!
To kick things off we met up in person to look at inspiration, mockups, and combinations together. This was also a great chance to talk about what was realistic within their timeframe and budget…
Here’s my first tip:
01. Designers — bring estimates to the first meeting! Brides — prepare to make some tough decisions depending on your budget.
Acrylic is expensive. Both to print AND mail. When your couples start talking about all the bells and whistles they want to add on (in this suite example, wax seals, ribbon, and materials other than paper were all factored into the cost), be prepared to inform them FROM THE BEGINNING about how weight and shape effect postage rates. In our first meeting, I told my couple to give me all their ideas/hopes/dreams so we could look at the list compared to their budget and make decisions, cuts, and choices from there.
Many couples are surprised at the costs involved in completely custom invites. It’s easy to see loads of complex, beautiful inspiration on Instagram or Pinterest and assume that’s the norm. I find myself explaining often that many designers add extra styling props to those photos to create the perfect flatlay…and it’s misleading.
The max thickness of a regular letter is 1/4 in and the max weight for a 55c mail piece is 1 oz. Even though I didn’t have exact numbers, I was able to advise that adding on all the pieces requested would increase the price significantly.
For actually printing the invites themselves, I was quoted 60 acrylic pieces at about $550.
If your guest list is on the smaller side, this may work just fine for you. Or, maybe you have crazy amounts of $ to spend! :) Either way, acrylic makes a bold statement and your guests will certainly be impressed when they receive an invite the size of a package.
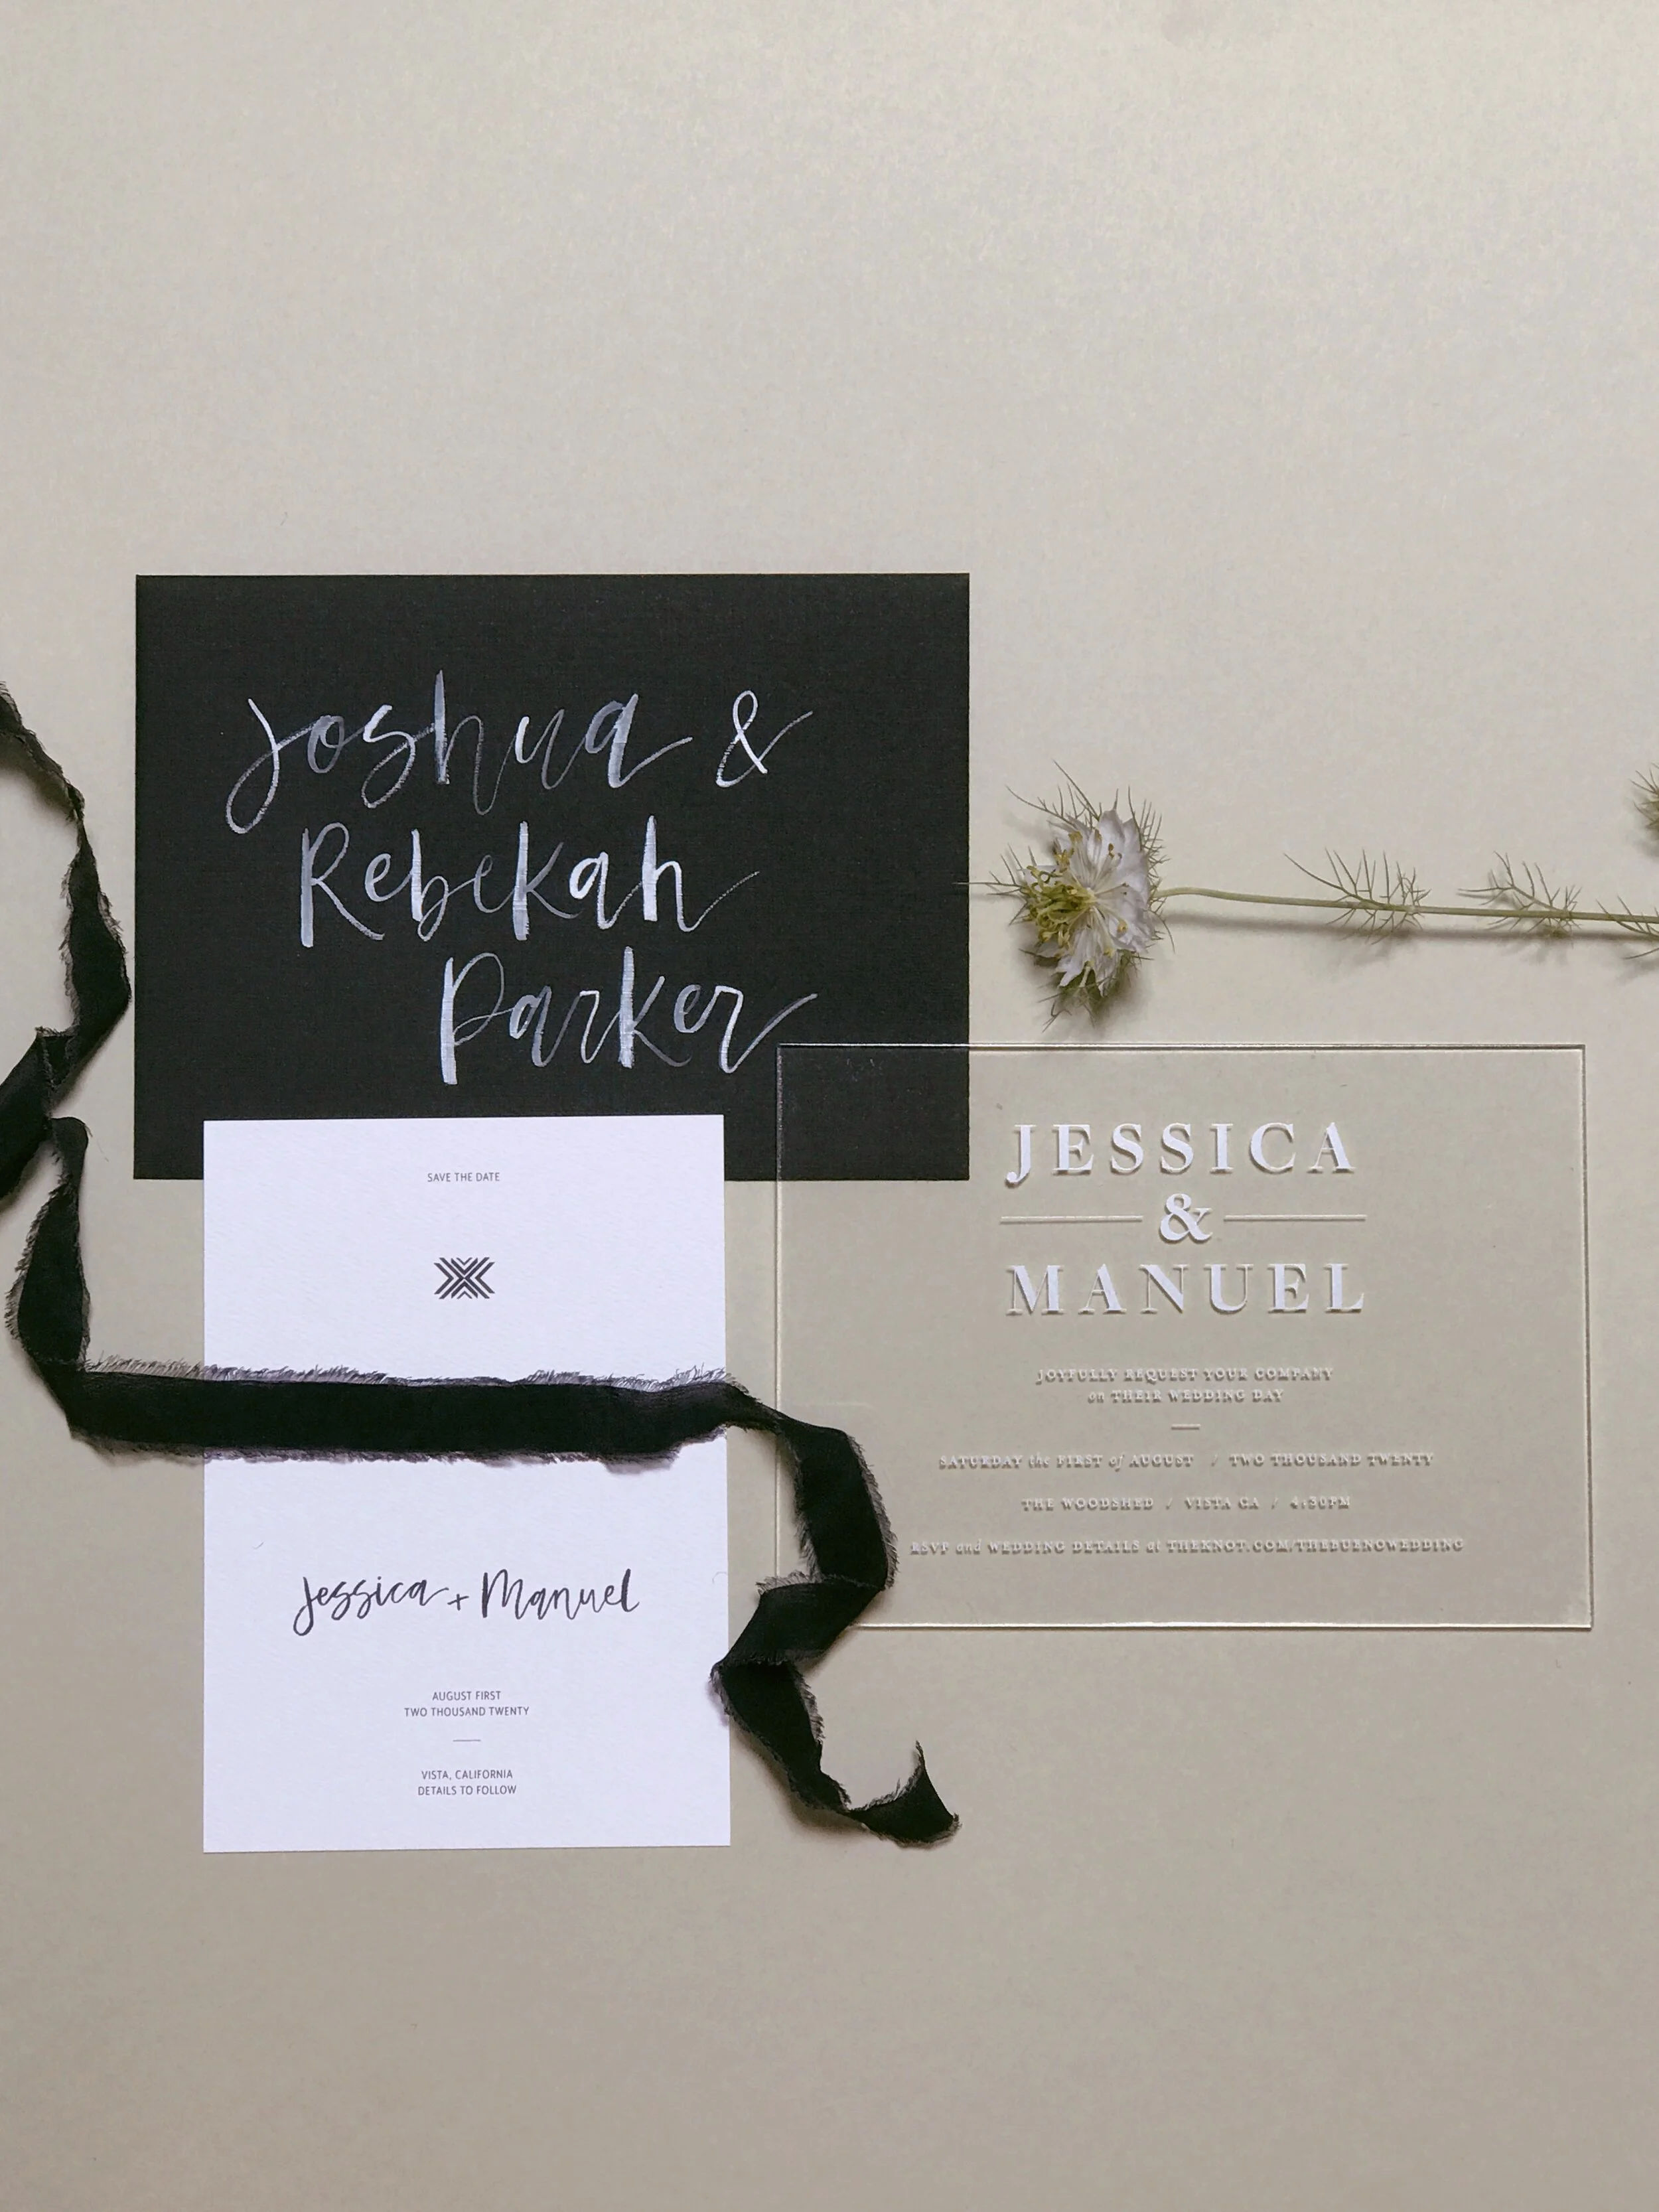
Here you can see the save the date (white linen paper + hand-dyed silk ribbon) next to the invite and invitation envelope. Ribbon is from Tono + Co.
Obviously, my clients decided to move forward with the acrylic, despite the cost. They were excited about the experience their guests would have when opening their invitations.
So the next step was finding a vendor who could print on acrylic. This was surprisingly difficult! I found a lot of online shops that offered pre-designed invites on acrylic, but not many where I could submit my own design.
Eventually I turned to Etsy, and I’m glad I did! I found Pretty Party Pleasers and was impressed with their positive shop reviews and range of choices. I also noted that they offered vinyl as well as acrylic, which is a thinner, lighter and more easily mailed choice. (This is a great option to be aware of for designers if their clients want the look for less.)
I submitted an Illustrator file with outlined fonts, and we were off to the races.
TIP NUMBER TWO:
02. Consider a protective layer to ward off dust and scratches!
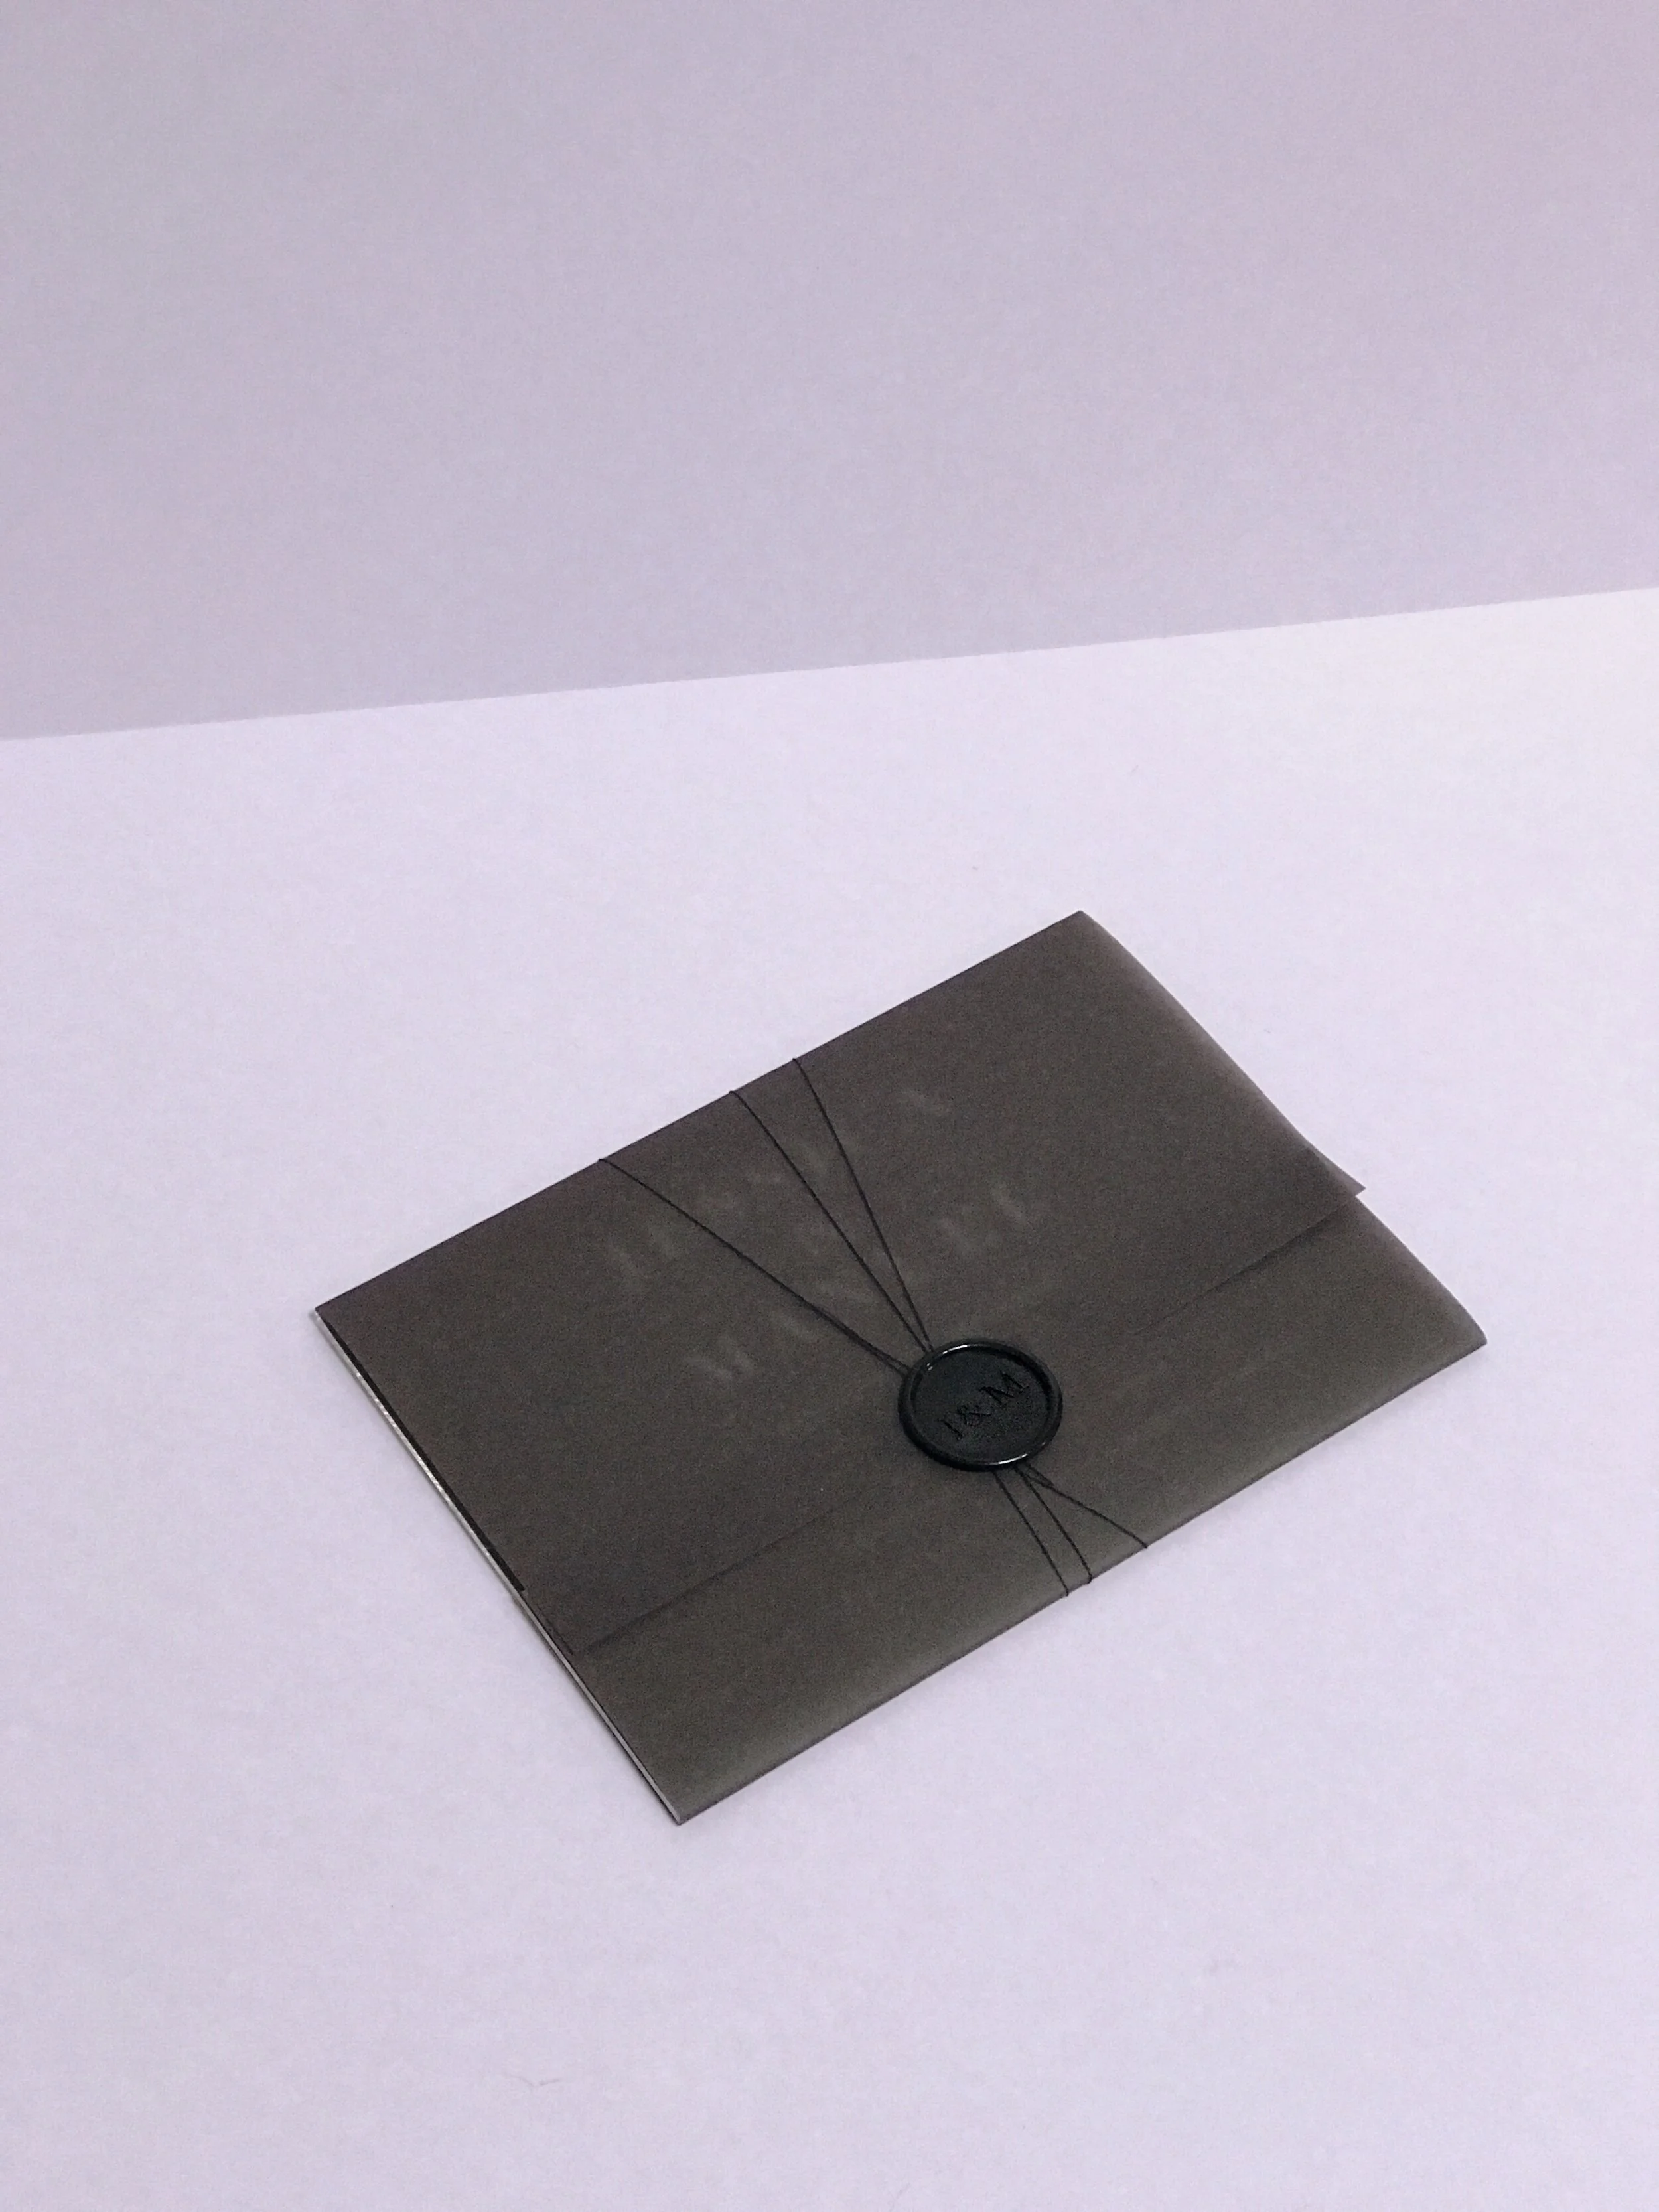
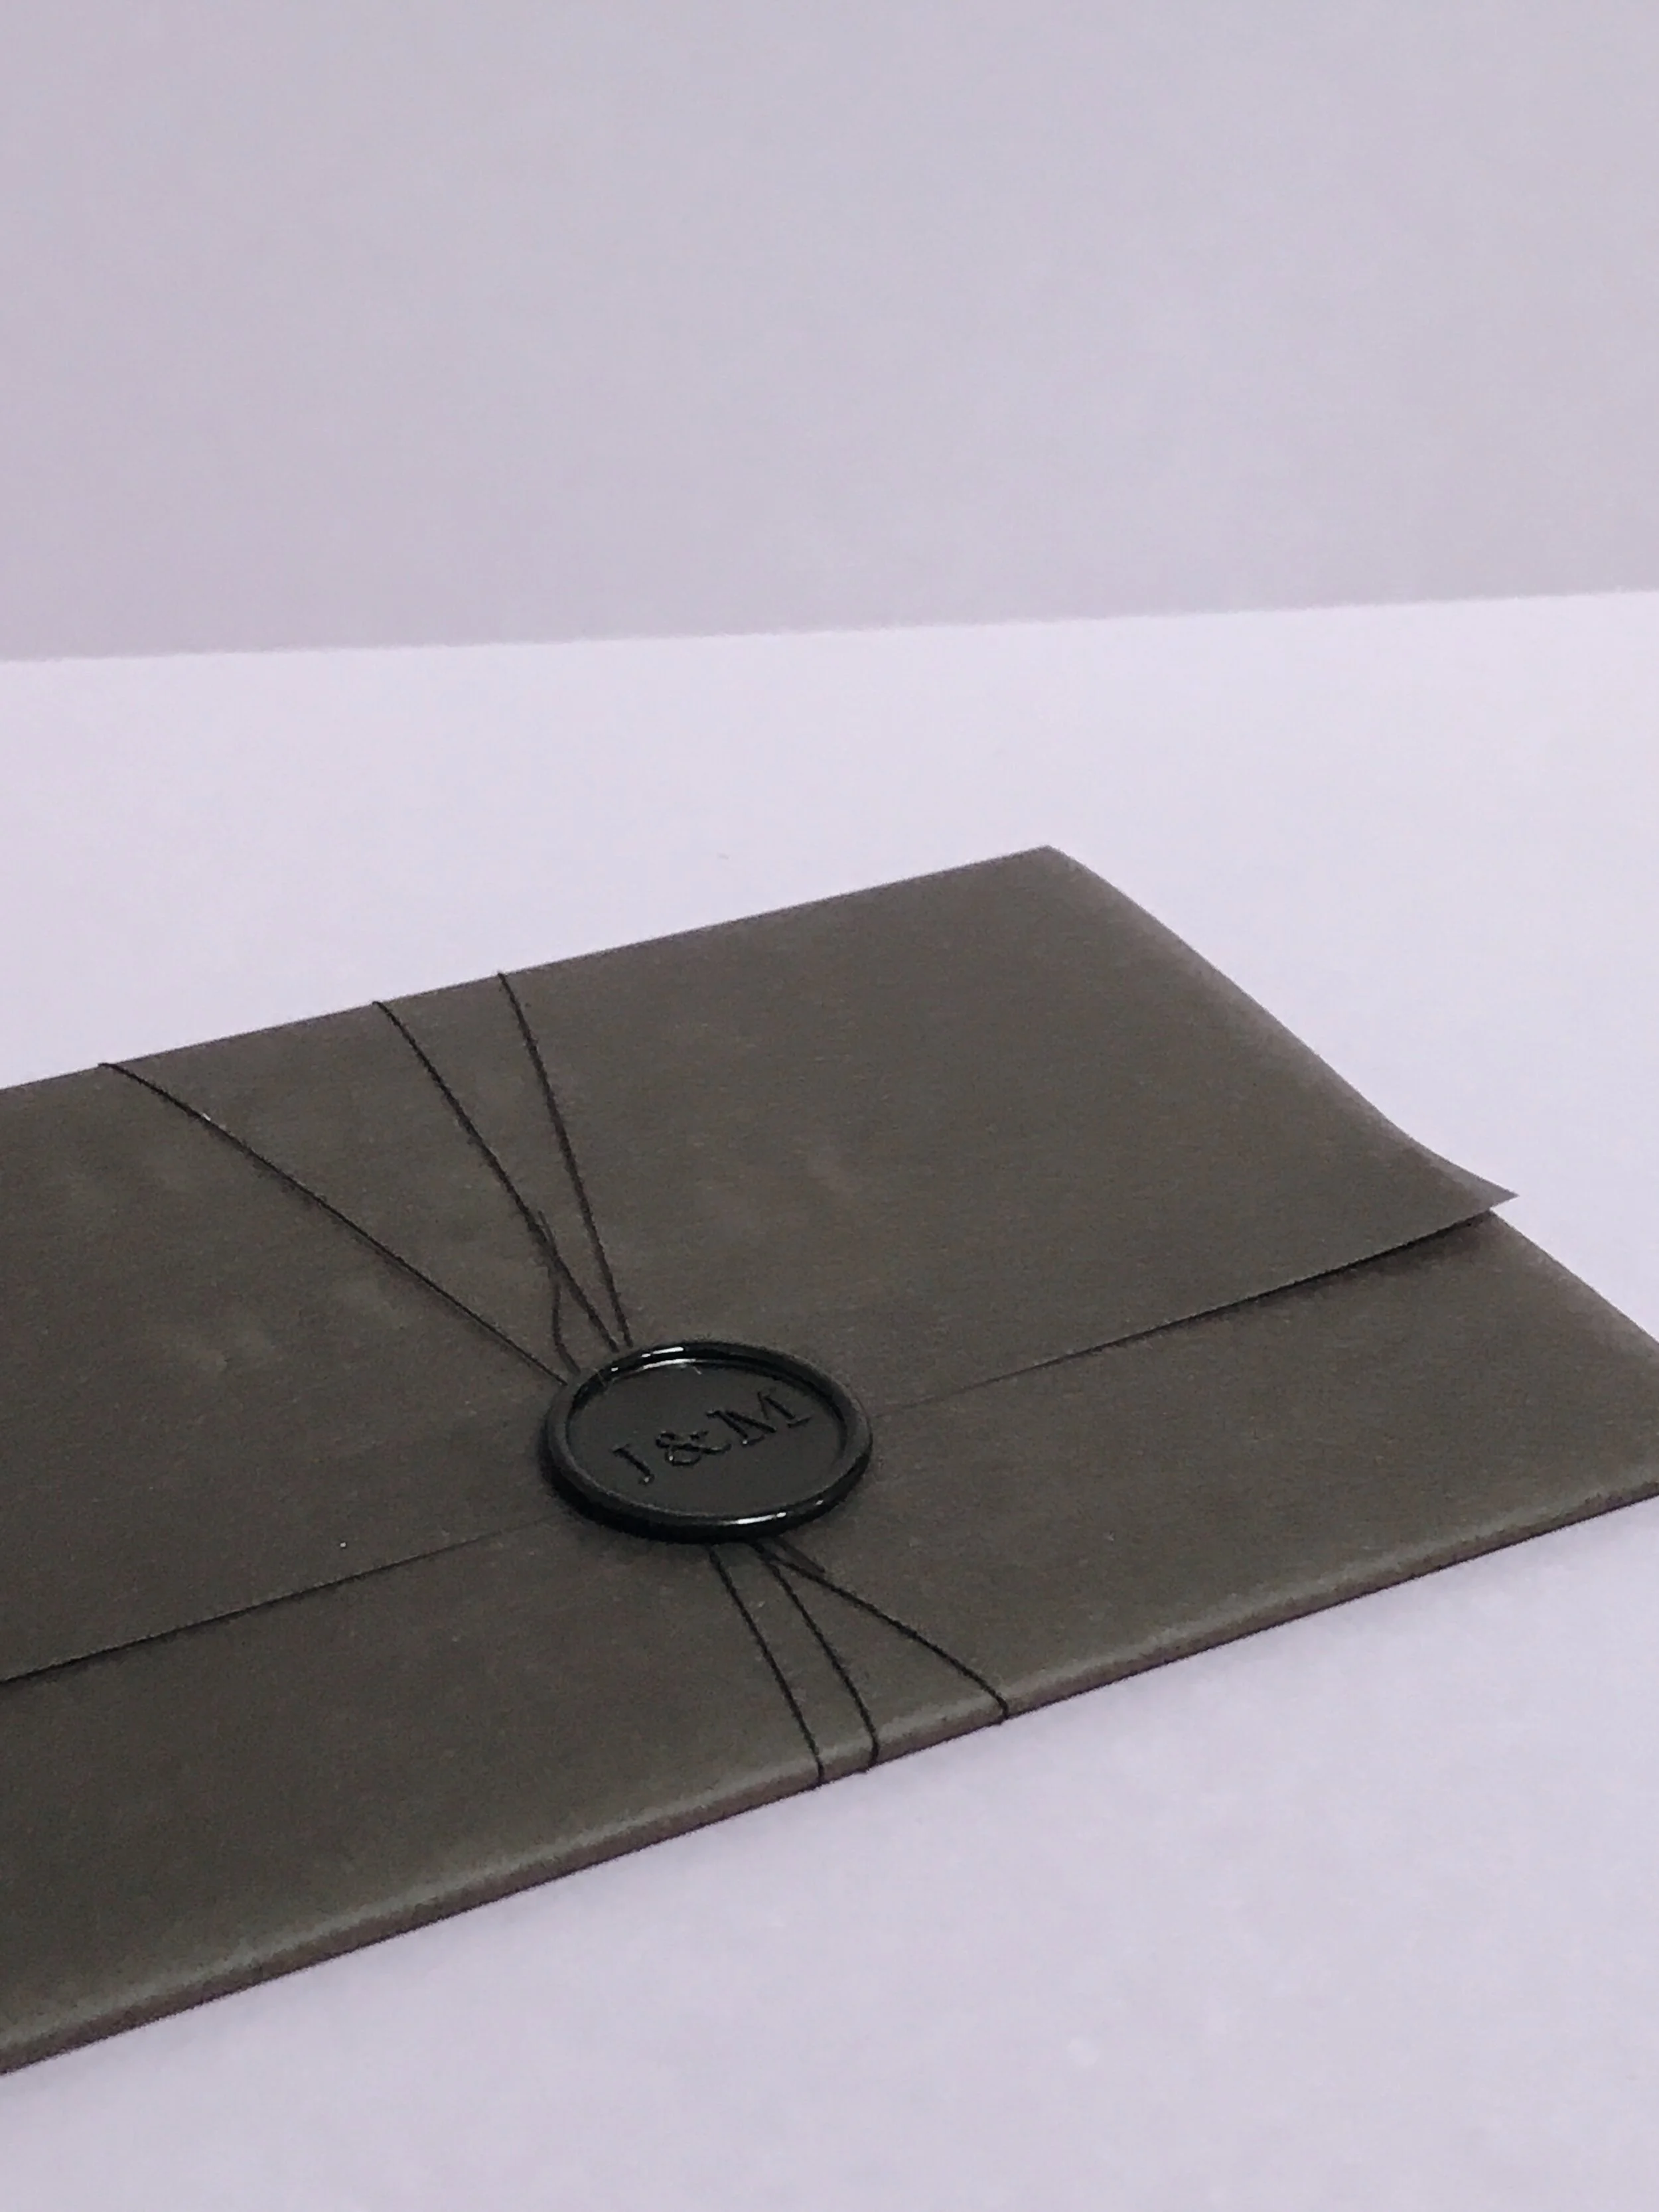
The acrylic pieces arrived with protective backings to separate them all. I used an eyeglass cleaning cloth to gently pick each one up and peel the back off, to prevent my fingerprints from getting everywhere. I then wrapped them in sheets of black vellum. My clients had initially suggested this as an aesthetic choice, but it turned out to be a great solution to protect the beautiful invites from harm! Acrylic scratches SO. easily. Dust and fingerprints can be cleaned off but its worth noting that just leaving it lying around can make mysterious scratches appear.
Adding some black thread and a wax seal with the couple’s initials to hold the vellum together made the whole package look really sleek and sophisticated.
Black vellum via Onvalop (Etsy), wax seals via Artisaire.
The final step is of course to send out the invitations. Figuring out how much postage would be was a bit tricky. Once the acrylic pieces arrived, I weighed them on the digital food scale I have at home to get an estimate of how much each piece would be, and added a few ounces for the vellum, seals, envelope, etc. I estimated about $5 per piece, which was slightly more than they turned out to be, but pretty close!
The best way to know for sure is to go to the post office and have them give you an estimate. They can also advise on any special instructions.
Because acrylic can get broken in the mail, a regular envelope just isn’t going to cut it. The paper envelope can also be torn by the sharp edges of the acrylic. So the solution is a flat photo mailer! A 6x9 flat mailer works perfectly to house a 5x7 invitation. There isn’t as much extra room left over as you’d think, either.
My couple wanted hand lettered envelopes to match their save the date envelopes, so our solution was to just tuck the whole envelope package inside a matching black flat mailer. I printed labels using the same fonts as the invitations so that everything tied together nicely.
THAT BRINGS US TO TIP NUMBER THREE:
03. Check with the post office for accurate mailing info
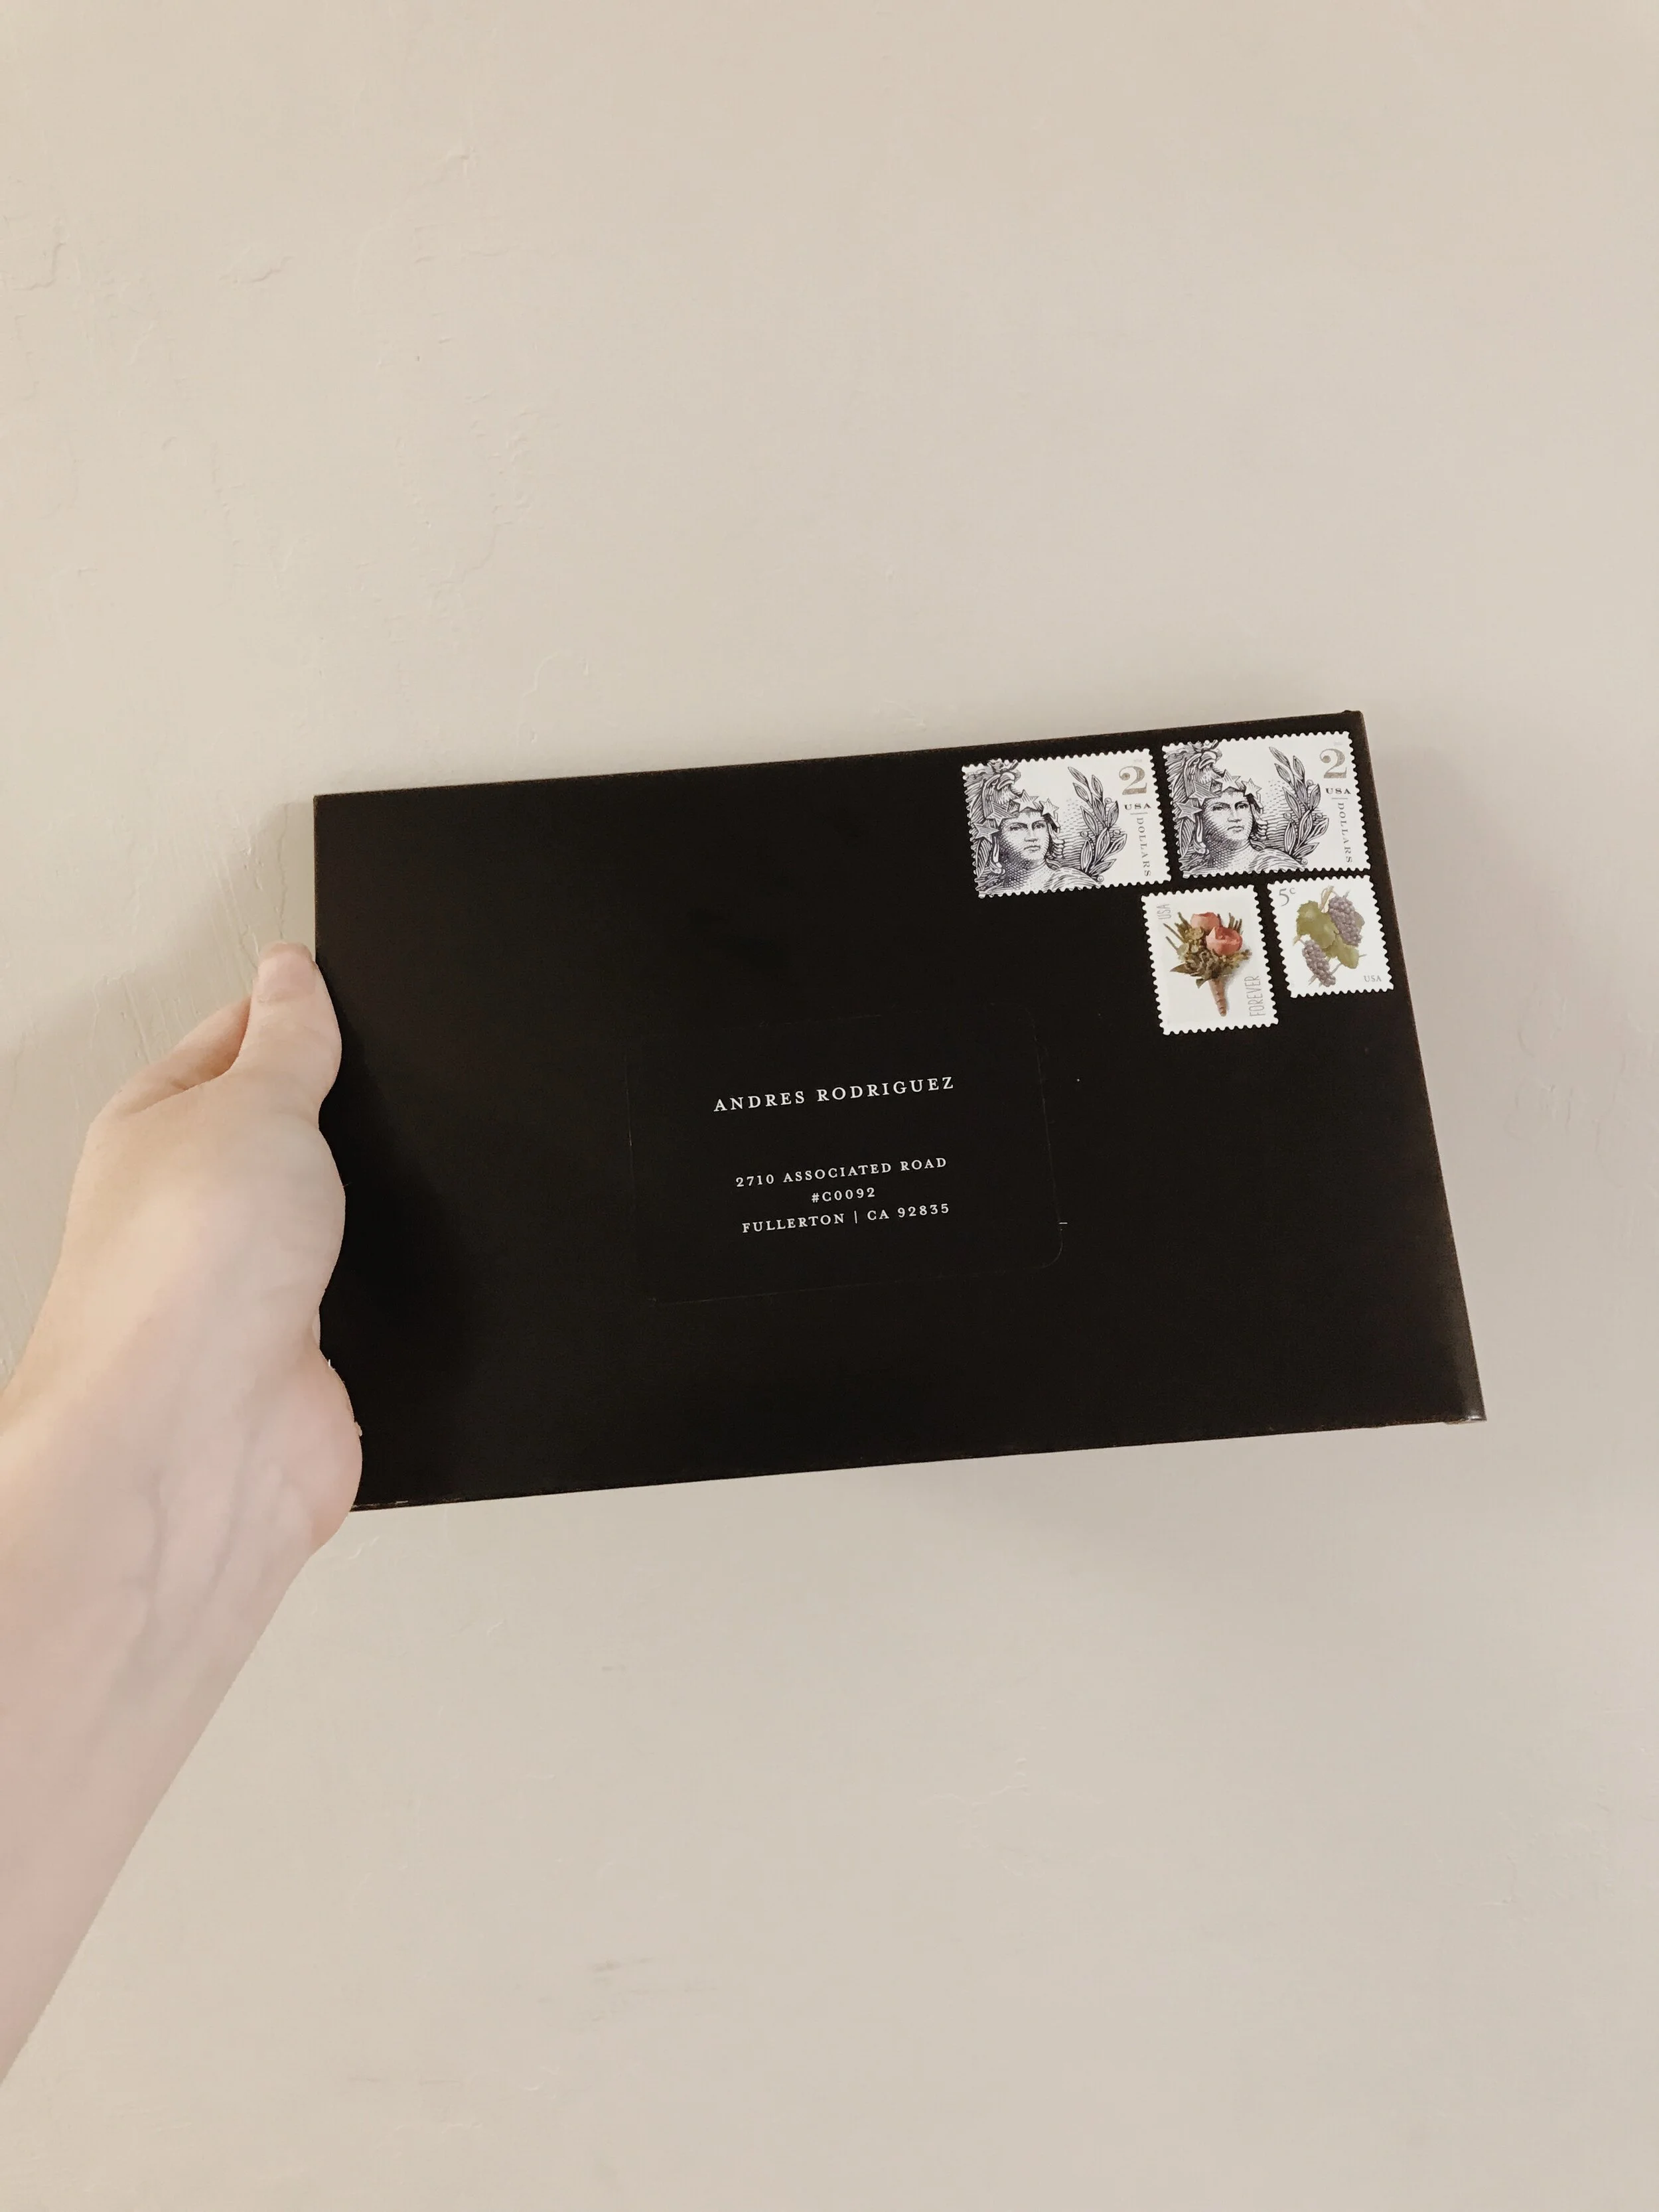
Pretty much anything fancy or unusual (thick acrylic, wax seals, dried florals, square shaped invites, etc) is going to cost more to mail. This is because none of these items can go through the machines at the post office, making them have to be “hand cancelled”. Weight is the biggest determining factor of course, but it’s worth noting that any non-machinable mail costs 70 cents (more than a forever stamp), even if it’s paper.
The total cost for mailing these formal invitations was $4.60 PER invite. This was shocking to discover, but the acrylic pieces alone weigh several ounces. Add in the vellum wrap, wax seal, inner envelope, and outer protective shell and you’ve got yourself a hefty piece of mail. It’s basically a small package.
That said, look at these beauties! We had the choice between the post office printing a label for the price or a collage of stamps that totaled the cost, so obviously I went for the stamps.
I printed the labels with Moo.com - highly recommend for quality and fast shipping, as well as a great user experience on their website. (not sponsored, I just love them!)

The whole suite together is a sight to behold! I believe invitations are the first touchpoint for guests and should reflect the theme and vibe they can expect from the event itself. This couple has a flair for the dramatic so it sets the tone perfectly! I can’t wait to attend their ceremony and cheer them on in a lifetime of love and happiness.
Any questions? Let me know in the comments!
x, M